Industrial, Manufacturing and Warehousing Industry Barcode Software Screenshots
Barcode software has greatly helped the manufacturing industry achieve success by improving efficiency, and quality, and reducing human errors. Barcodes are used to track warehouse inputs, raw materials, stored warehouse goods, and various products in an efficient and error-free manner. The application is integrated with inbuilt flexible print settings that allow you to print designed barcode labels in different shapes and sizes. Business Barcodes Maker for the Warehouse Industry is created with an easy-to-use, creative platform that allows users to customize their barcode features and settings to create high-quality barcodes using any linear or 2D barcode font. It is possible to craft high-resolution manufacturing standards or warehouse barcodes that are easily scanned and printed by all common barcode printers and scanners.
Create Warehouse Industry Barcode Labels Using the Following Steps:
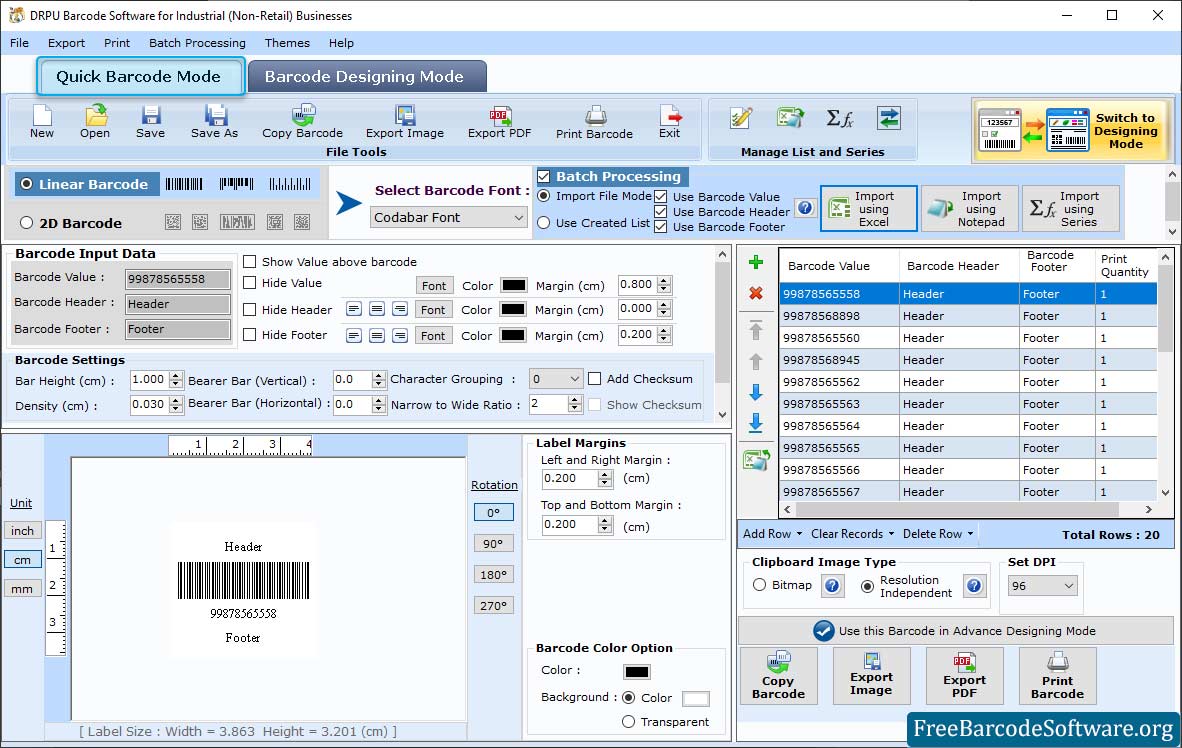
Step1: Choose Quick Barcode Mode to design your barcode and change barcode settings as per business requirements.

➣ First you need to select barcode technology with font type. Then set barcode value, header, footer and various settings (General, Font, Color and Image) as per need.
➣ Select "Add Checksum" and "Show Checksum" options if required while creating the barcode label. It is a value used to check the integrity of barcode values.
➣ Enable batch processing mode to add the barcode header and barcode footer details.
➣ Set the barcode header and footer to the left, center, and right. Set the vertical height of the bars in the barcode label and density (density is the width between barcode bars).
➣ Change the Font, Font style and size of the Barcode header and footer value.
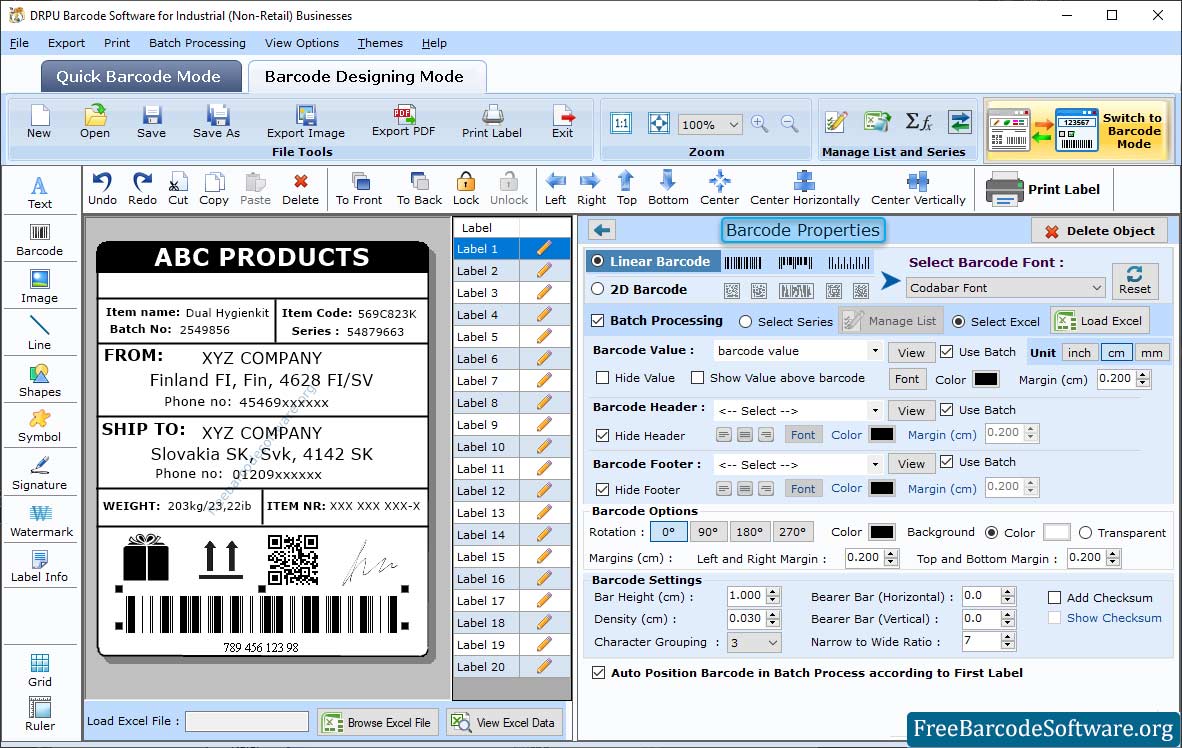
Step2: To add a barcode to your label, click on the barcode option from the toolbar and choose barcode technology (linear or 2D).

➣ Select Linear Barcode and Font then enter the Barcode Value, Header and Footer.
➣ Enter the barcode value, header, and footer. Specify the bearer bar, character grouping, orientation, and so on.
➣ You can set barcode height, density, and barcode margin.
➣ Set the barcode font and style, as well as the barcode and background colors. After setting your desired field of barcode properties, move to the next step.
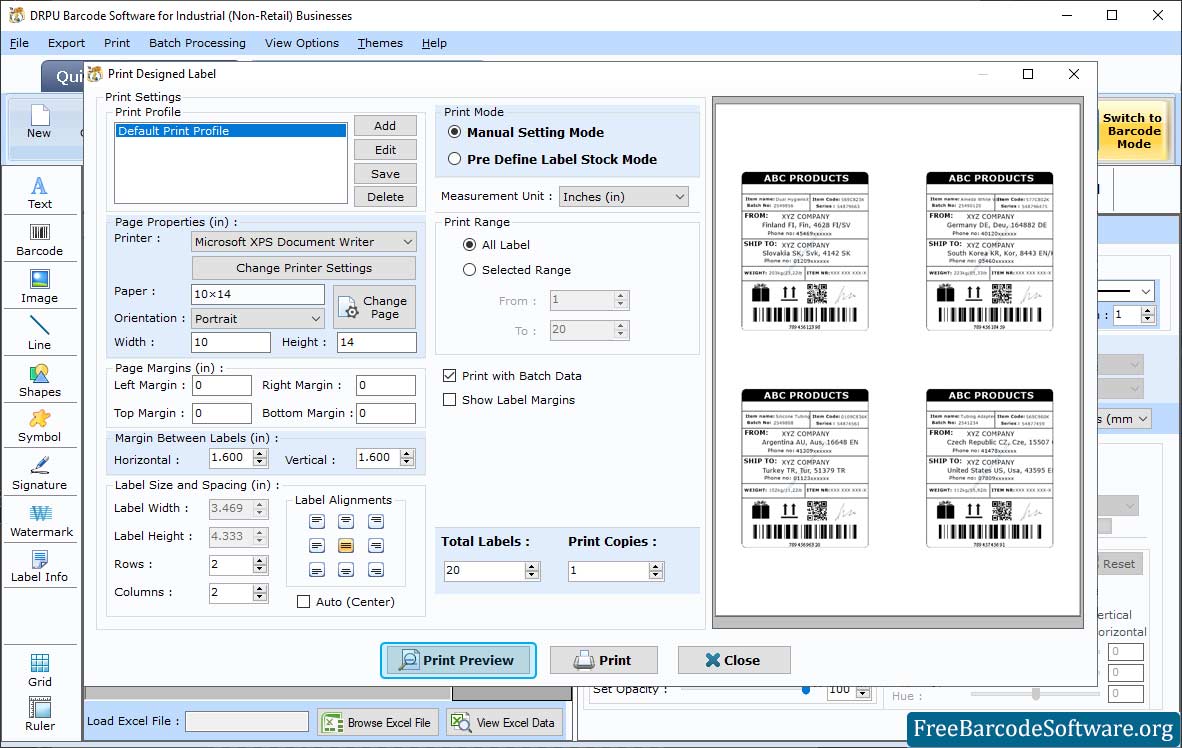
Step3: To print your designed labels, go to the print option from the toolbar. Choose the mode of printing accordingly.

➣ After designing barcode label, go to print option from top and select Print mode (Manual or Pre Define). Print preview option is available to avoid printing errors.
➣ Choose any Print Mode option (Pre-Defined Label Stock or Manual Print Mode).
➣ If you choose Pre-Define Stock mode, you need to select a label product and set label details.
➣ If you select Manual mode, then you have to specify Page Properties, Label Margin, and other printing options manually.
➣ A print preview facility is also available to avoid printing mistakes and printing errors. After setting your desired field of print, select the "Print Button" to print designed barcode labels.